Fortunately, some of the most annoying little defects around your home are the simplest to fix. A squeaking door hinge just needs a little oil, a new rubber washer can stop a dripping hose, and double-sided tape is a quick fix for a loose corner on vinyl tile. But is it really that simple to fix that uber annoying loose handle on your toilet? The answer is a resounding, yes!
A Simple Fix
While it might appear to be a serious issue, after all, it does operate the critical flushing action, fixing a loose toilet handle is a 5-minute job. And the only tool that you need is an adjustable wrench. Once you have your wrench and an old rag, turn off the water to the toilet. This is done with the valve that is behind the toilet and often very close to the floor.
Getting Down To Business
Next, close the toilet seat lid and remove the tank cover. Be sure to use two hands as the lid is often cumbersome and can be moist or damp underneath, making it slippery. Once the lid is out of the way, press the lever to empty the water from the tank. This will give you unobstructed access to the inside of the toilet handle assembly.
A Firm But Gentle Touch
Locate the metal nut inside the tank that is directly inside from the handle. In almost every loose handle case, the nut has just worked loose. Grasp the nut with your adjustable wrench and turn the nut counterclockwise gently. You want to snug the nut but not over tighten it. Turning the nut too far could strip the handle or even crack the porcelain tank. If that happens, you are looking at a much more challenging replacement or a call to (214) 388-4525 to schedule an appointment with a Metroplex Leak & Line licensed plumber.
Test Your Work
Once the nut is secured, test the lever handle by pressing it. It should feel stable and not rattle against the tank. If this is the case, then congratulate yourself on an excellent repair and turn the toilet water supply back on at the lower valve. Replace the tank lid, and the job is done.
What If This Process Did Not Fix The Issue?
If tightening the nut did not eliminate your wiggly, jiggly toilet handle, then you are going to need to do a little more research and work. You can research the replacement parts for your specific toilet, or you can head out to the plumbing section of the big box store in search of a universal model. It can be helpful to take a quick picture of the inside of the toilet water tank for reference when you are comparing the universal replacement parts.
New Parts, New DIY Project
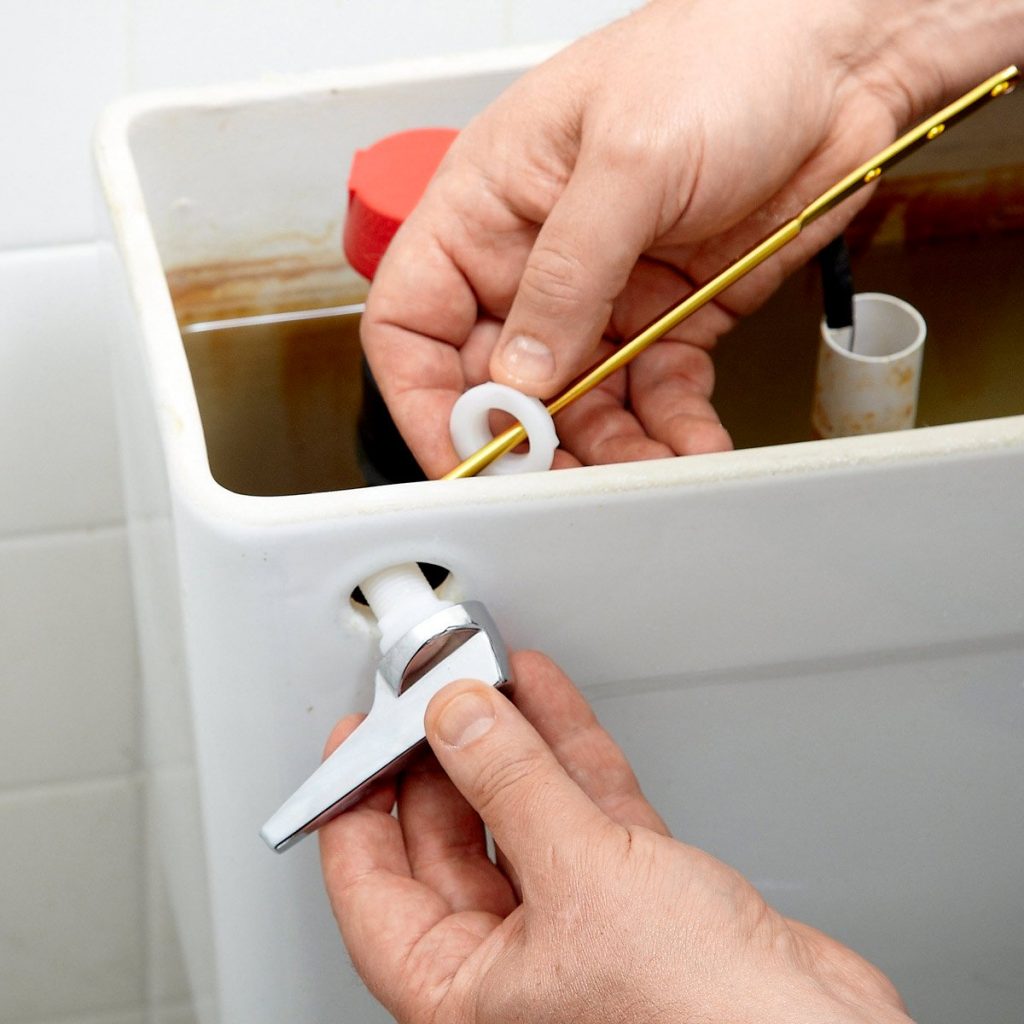
With your new toilet handle purchase completed, you are ready to tackle this only slightly more challenging project. Back inside the tank with the water off and drained, remove the small chain that connects the flapper to the handle. Next, remove the mounting nut completely and pull out the old handle.
In With the New
Remove the mounting nut from the new handle and insert the handle into the tank. Then install the mounting nut onto the new handle until it is snug. Remember, not too tight, or you will be back out shopping for a new toilet. Then attach the chain from the flapper to the new handle and try a few test flushes to make sure the lever handle is secure.
The Home Stretch
Once you are satisfied that the lever handle is secure, turn the water on and give the handle a test run. You can typically adjust the location that the chain attaches to the lever if you find that the flapper is not moving correctly. Now congratulate yourself on a level 2 DIY repair!
If you have any issues with these repairs or in the function of the water valve for the toilet, call (214) 388-4525 to schedule a service call from a Metroplex Leak & Line licensed plumber. On occasion, older toilet valves can become stuck, and it is always better to trust the pros from Metroplex Leak &Line than to turn a small DIY repair into an expensive project repairing water damage from a flood.


